|
|
<h1><center>日志中心集群</center></h1>
|
|
|
|
|
|
作者:行癫(盗版必究)
|
|
|
|
|
|
------
|
|
|
|
|
|
## 一:组件介绍
|
|
|
|
|
|
#### 1.Elasticsearch
|
|
|
|
|
|
主要用来日志存储
|
|
|
|
|
|
是一个基于Lucene的搜索服务器。提供搜集、分析、存储数据三大功能。它提供了一个分布式多用户能力的全文搜索引擎,基于RESTful web接口。Elasticsearch是用Java开发的,并作为Apache许可条款下的开放源码发布,是当前流行的企业级搜索引擎。设计用于云计算中,能够达到实时搜索,稳定,可靠,快速,安装使用方便。
|
|
|
|
|
|
#### 2.Logstash
|
|
|
|
|
|
主要用来日志的搜集
|
|
|
|
|
|
主要是用来日志的搜集、分析、过滤日志的工具。用于管理日志和事件的工具,你可以用它去收集日志、转换日志、解析日志并将他们作为数据提供给其它模块调用,例如搜索、存储等。
|
|
|
|
|
|
#### 3.Kibana
|
|
|
|
|
|
主要用于日志的展示
|
|
|
|
|
|
是一个优秀的前端日志展示框架,它可以非常详细的将日志转化为各种图表,为用户提供强大的数据可视化支持,它能够搜索、展示存储在 Elasticsearch 中索引数据。使用它可以很方便的用图表、表格、地图展示和分析数据。
|
|
|
|
|
|
#### 4.Kafka
|
|
|
|
|
|
是一种高吞吐量的分布式发布订阅消息系统。具有峰值处理能力,使用消息队列能够使关键组件顶住突发的访问压力,而不会因为突发的超负荷的请求而完全崩溃。
|
|
|
|
|
|
#### 5.Filebeat
|
|
|
|
|
|
隶属于Beats,轻量级数据收集引擎。基于原先 Logstash-fowarder 的源码改造出来。换句话说:Filebeat就是新版的 Logstash-fowarder,也会是 ELK Stack 在 Agent 的第一选择;常见的Beat有:
|
|
|
|
|
|
Packetbeat(搜集网络流量数据)
|
|
|
|
|
|
Metricbeat(搜集系统、进程和文件系统级别的 CPU 和内存使用情况等数据)
|
|
|
|
|
|
Filebeat(搜集文件数据)
|
|
|
|
|
|
Winlogbeat(搜集 Windows 事件日志数据)
|
|
|
|
|
|
#### 6.为什么会用到ELK
|
|
|
|
|
|
普通的日志分析场景:直接在日志文件中grep、awk就可以获得自己想要的信息,但在规模较大的场景中,此方法效率底下,面临问题包括日志量太大如何归档、文本搜索太慢、如何多纬度的查询。这样我们就需要集中化的日志管理,所有的服务器上的日志收集汇总。解决方案:建立集中式日志收集系统,将所有节点上的日志统一收集,管理,访问。
|
|
|
|
|
|

|
|
|
|
|
|
## 二:集群构建
|
|
|
|
|
|
#### 1.架构
|
|
|
|
|
|
<img src="https://diandiange.oss-cn-beijing.aliyuncs.com/image-20240531093110260.png" alt="image-20240531093110260" style="zoom:100%;" />
|
|
|
|
|
|
**基础架构**
|
|
|
|
|
|
单一的架构,logstash作为日志搜集器,从数据源采集数据,并对数据进行过滤,格式化处理,然后交由Elasticsearch存储,kibana对日志进行可视化处理
|
|
|
|
|
|

|
|
|
|
|
|
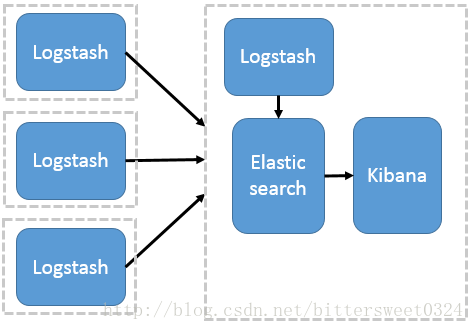
**多节点部署Logstash架构**
|
|
|
|
|
|
这种架构模式适合需要采集日志的客户端不多,且各服务端cpu,内存等资源充足的情况下。因为每个节点都安装Logstash, 非常消耗节点资源。其中,logstash作为日志搜集器,将每一台节点的数据发送到Elasticsearch上进行存储,再由kibana进行可视化分析。
|
|
|
|
|
|

|
|
|
|
|
|
#### 2.版本说明
|
|
|
|
|
|
Elasticsearch: 6.5.4
|
|
|
|
|
|
Logstash: 6.5.4
|
|
|
|
|
|
Kibana: 6.5.4
|
|
|
|
|
|
Kafka: 2.11-1
|
|
|
|
|
|
Filebeat: 6.5.4
|
|
|
|
|
|
#### 3.官网地址
|
|
|
|
|
|
官网地址:https://www.elastic.co
|
|
|
|
|
|
官网搭建:https://www.elastic.co/guide/index.html
|
|
|
|
|
|
#### 4.集群部署
|
|
|
|
|
|
系统类型:Centos7.x
|
|
|
|
|
|
节点IP:172.16.244.25、172.16.244.26、172.16.244.27
|
|
|
|
|
|
软件版本:jdk-8u121-linux-x64.tar.gz、elasticsearch-6.5.4.tar.gz
|
|
|
|
|
|
示例节点:172.16.244.25 ABC
|
|
|
|
|
|
##### node-1节点
|
|
|
|
|
|
安装配置jdk
|
|
|
|
|
|
```shell
|
|
|
[root@xingdian ~]# tar zxvf /usr/local/package/jdk-8u121-linux-x64.tar.gz -C /usr/local/
|
|
|
[root@xingdian ~]# mv /usr/local/jdk-8u121 /usr/local/java
|
|
|
[root@xingdian ~]# vim /etc/profile
|
|
|
JAVA_HOME=/usr/local/java
|
|
|
PATH=$JAVA_HOME/bin:$PATH
|
|
|
export JAVA_HOME PATH
|
|
|
[root@xingdian ~]# source /etc/profile
|
|
|
```
|
|
|
|
|
|
创建运行ES的普通用户
|
|
|
|
|
|
```shell
|
|
|
[root@xingdian ~]# useradd elsearch (useradd ela)
|
|
|
[root@xingdian ~]# echo "******" | passwd --stdin "elsearch"
|
|
|
```
|
|
|
|
|
|
安装配置ES
|
|
|
|
|
|
```shell
|
|
|
[root@xingdian ~]# tar zxvf /usr/local/package/elasticsearch-6.5.4.tar.gz -C /usr/local/
|
|
|
[root@xingdian ~]# vim /usr/local/elasticsearch-6.5.4/config/elasticsearch.yml
|
|
|
cluster.name: bjbpe01-elk
|
|
|
node.name: elk01
|
|
|
node.master: true
|
|
|
node.data: true
|
|
|
path.data: /data/elasticsearch/data
|
|
|
path.logs: /data/elasticsearch/logs
|
|
|
bootstrap.memory_lock: false
|
|
|
bootstrap.system_call_filter: false
|
|
|
network.host: 0.0.0.0
|
|
|
http.port: 9200
|
|
|
#discovery.zen.ping.unicast.hosts: ["172.16.244.26", "172.16.244.27"]
|
|
|
#discovery.zen.ping_timeout: 150s
|
|
|
#discovery.zen.fd.ping_retries: 10
|
|
|
#client.transport.ping_timeout: 60s
|
|
|
http.cors.enabled: true
|
|
|
http.cors.allow-origin: "*"
|
|
|
注意:如果是集群取消配置文件中的所有注释,并修改对应的参数
|
|
|
```
|
|
|
|
|
|
设置JVM堆大小
|
|
|
|
|
|
```shell
|
|
|
[root@xingdian ~]# sed -i 's/-Xms1g/-Xms4g/' /usr/local/elasticsearch-6.5.4/config/jvm.options
|
|
|
[root@xingdian ~]# sed -i 's/-Xmx1g/-Xmx4g/' /usr/local/elasticsearch-6.5.4/config/jvm.options
|
|
|
注意: 确保堆内存最小值(Xms)与最大值(Xmx)的大小相同,防止程序在运行时改变堆内存大小。 如果系统内存足够大,将堆内存最大和最小值设置为31G,因为有一个32G性能瓶颈问题。 堆内存大小不要超过系统内存的50%。
|
|
|
```
|
|
|
|
|
|
创建ES数据及日志存储目录
|
|
|
|
|
|
```shell
|
|
|
[root@xingdian ~]# mkdir -p /data/elasticsearch/data (/data/elasticsearch)
|
|
|
[root@xingdian ~]# mkdir -p /data/elasticsearch/logs (/log/elasticsearch)
|
|
|
```
|
|
|
|
|
|
修改安装目录及存储目录权限
|
|
|
|
|
|
```shell
|
|
|
[root@xingdian ~]# chown -R elsearch:elsearch /data/elasticsearch
|
|
|
[root@xingdian ~]# chown -R elsearch:elsearch /usr/local/elasticsearch-6.5.4
|
|
|
```
|
|
|
|
|
|
系统优化
|
|
|
|
|
|
```shell
|
|
|
修改/etc/security/limits.conf配置文件,将以下内容添加到配置文件中。(*表示所有用户)
|
|
|
* soft nofile 65536
|
|
|
* hard nofile 131072
|
|
|
* soft nproc 2048
|
|
|
* hard nproc 4096
|
|
|
```
|
|
|
|
|
|
增加最大内存映射数
|
|
|
|
|
|
```shell
|
|
|
[root@xingdian ~]# echo "vm.max_map_count=262144" >> /etc/sysctl.conf
|
|
|
[root@xingdian ~]# sysctl -p
|
|
|
```
|
|
|
|
|
|
启动ES
|
|
|
|
|
|
```shell
|
|
|
su - elsearch -c "cd /usr/local/elasticsearch-6.5.4 && nohup bin/elasticsearch &"
|
|
|
```
|
|
|
|
|
|
node-2节点的elasticsearch部署跟node-1相同
|
|
|
|
|
|
##### node-2节点
|
|
|
|
|
|
略
|
|
|
|
|
|
##### node-3节点
|
|
|
|
|
|
略
|
|
|
|
|
|
#### 5.配置文件
|
|
|
|
|
|
```shell
|
|
|
cluster.name 集群名称,各节点配成相同的集群名称。
|
|
|
node.name 节点名称,各节点配置不同。
|
|
|
node.master 指示某个节点是否符合成为主节点的条件。
|
|
|
node.data 指示节点是否为数据节点。数据节点包含并管理索引的一部分。
|
|
|
path.data 数据存储目录。
|
|
|
path.logs 日志存储目录。
|
|
|
bootstrap.memory_lock 内存锁定,是否禁用交换。
|
|
|
bootstrap.system_call_filter 系统调用过滤器。
|
|
|
network.host 绑定节点IP。
|
|
|
http.port rest api端口。
|
|
|
discovery.zen.ping.unicast.hosts 提供其他 Elasticsearch 服务节点的单点广播发现功能。
|
|
|
discovery.zen.ping_timeout 节点在发现过程中的等待时间。
|
|
|
discovery.zen.fd.ping_retries 节点发现重试次数。
|
|
|
http.cors.enabled 是否允许跨源 REST 请求,用于允许head插件访问ES。
|
|
|
http.cors.allow-origin 允许的源地址。
|
|
|
```
|
|
|
|
|
|
#### 6.浏览器访问测试
|
|
|
|
|
|
注意:默认端口9200
|
|
|
|
|
|

|
|
|
|
|
|
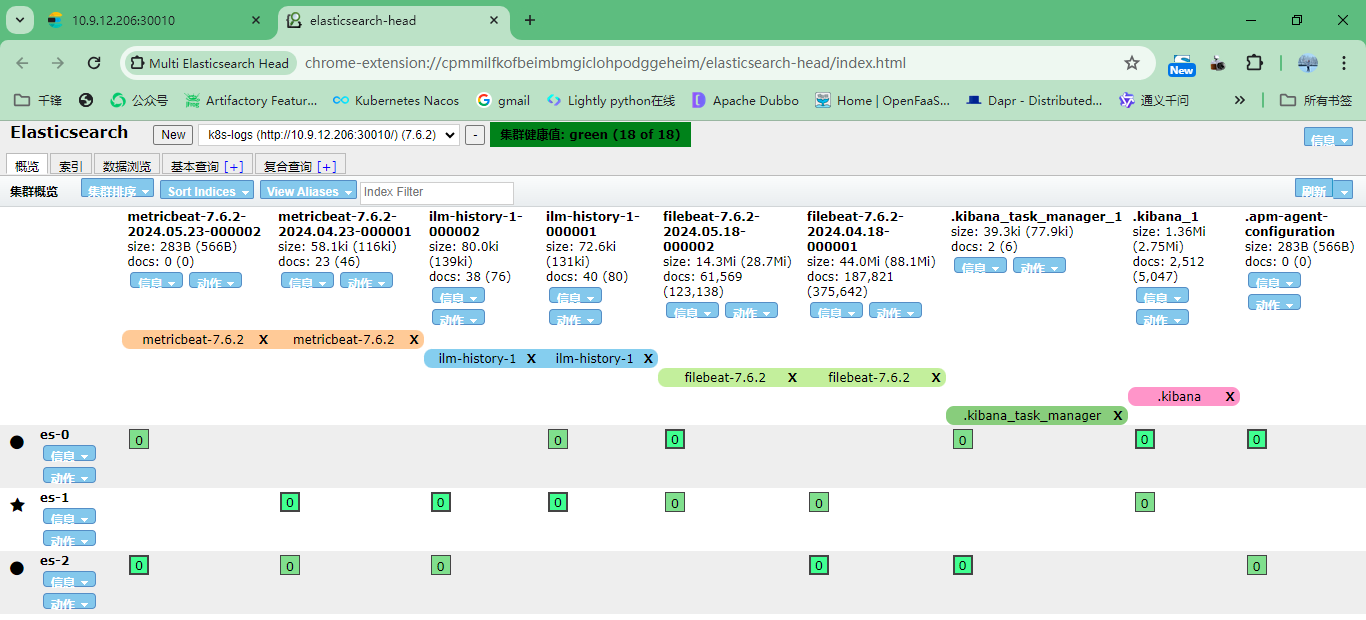
7.安装head插件
|
|
|
|
|
|
注意:使用google或者edge浏览器对应的head插件即可
|
|
|
|
|
|

|
|
|
|
|
|
#### 7.模拟数据插入
|
|
|
|
|
|
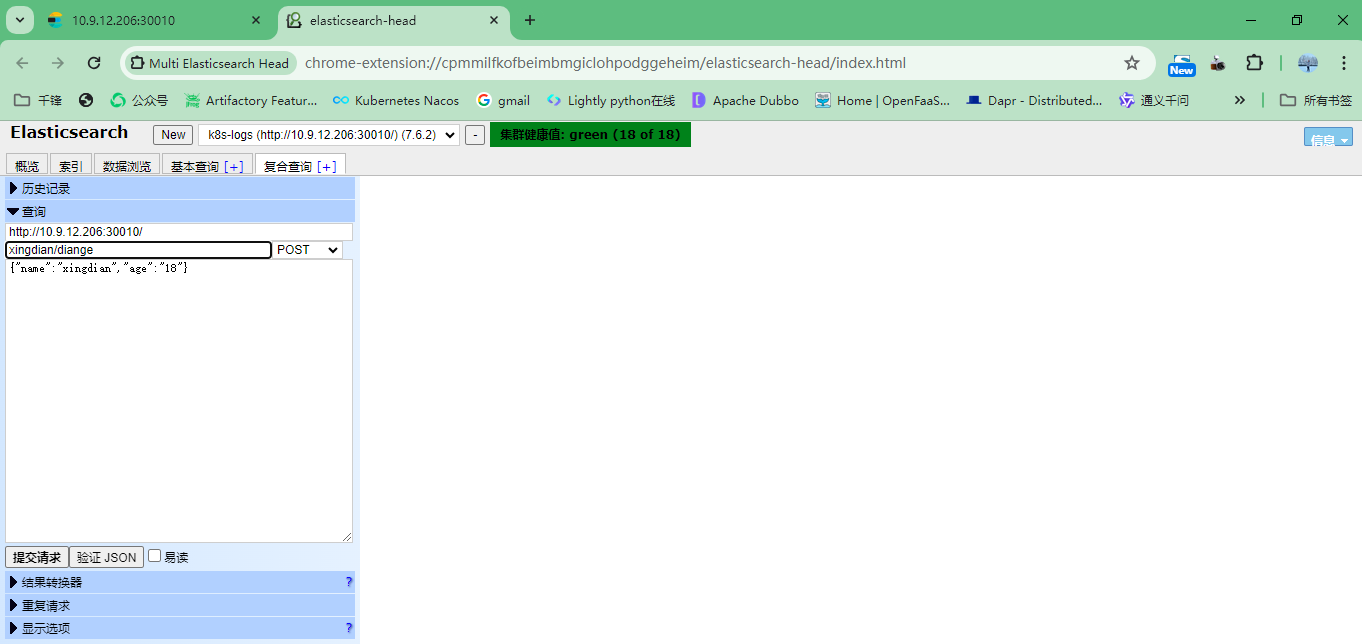
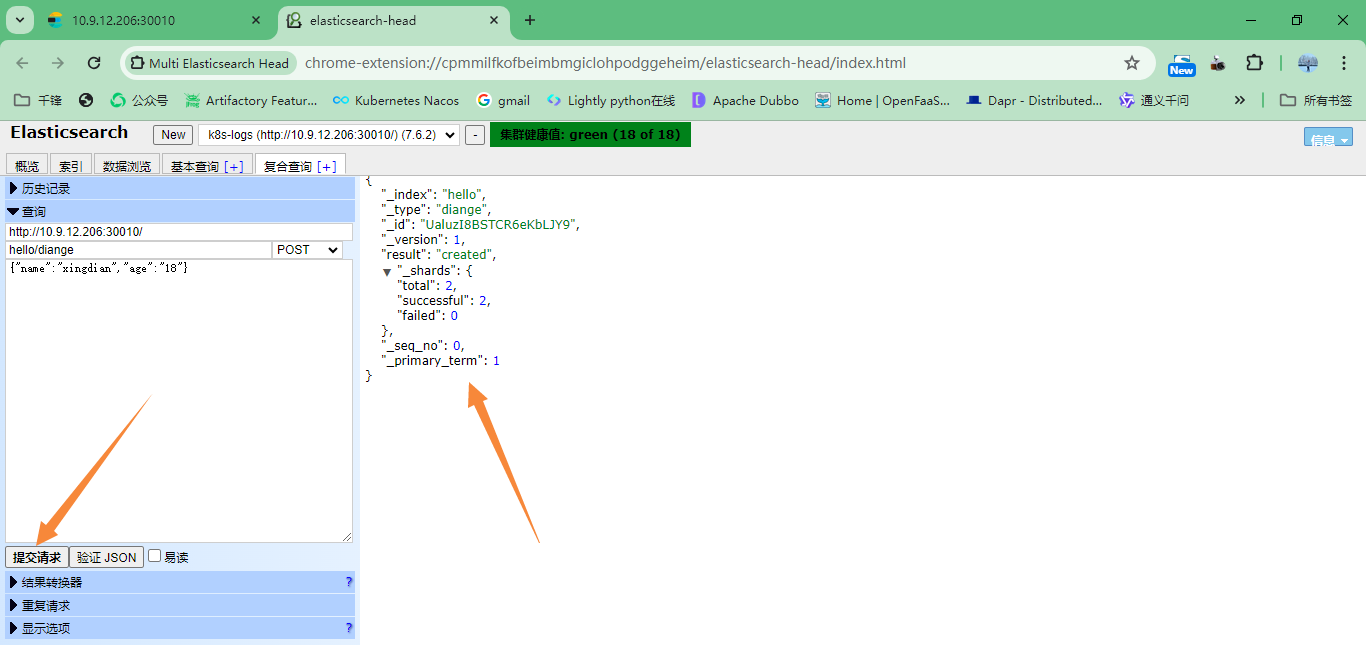
注意:索引名字:xingdian/test 数据: {"user":"xingdian","mesg":"hello world"}
|
|
|
|
|
|

|
|
|
|
|
|

|
|
|
|
|
|

|
|
|
|
|
|
## 三:Kibana安装部署
|
|
|
|
|
|
#### 1.获取包
|
|
|
|
|
|
无
|
|
|
|
|
|
#### 2.解压安装
|
|
|
|
|
|
```shell
|
|
|
[root@kibana ~]# tar xf kibana-6.5.4-linux-x86_64.tar.gz
|
|
|
[root@kibana ~]# mv kibana-6.5.4-linux-x86_64 /usr/local/kibana
|
|
|
```
|
|
|
|
|
|
#### 3.修改配置
|
|
|
|
|
|
```shell
|
|
|
[root@kibana ~]# vi /usr/local/kibana/config/kibana.yml
|
|
|
server.port: 5601
|
|
|
server.host: "172.16.244.28"
|
|
|
elasticsearch.url: "http://172.16.244.25:9200"
|
|
|
kibana.index: ".kibana"
|
|
|
```
|
|
|
|
|
|
注意:
|
|
|
|
|
|
server.port kibana服务端口,默认5601
|
|
|
|
|
|
server.host kibana主机IP地址,默认localhost
|
|
|
|
|
|
elasticsearch.url 用来做查询的ES节点的URL,默认http://localhost:9200
|
|
|
|
|
|
#### 4.启动访问
|
|
|
|
|
|
```sjell
|
|
|
[root@kibana ~]# cd /usr/local/kibana
|
|
|
nohup ./bin/kibana &
|
|
|
```
|
|
|
|
|
|
5.使用kibana关联到ES
|
|
|
|
|
|

|
|
|
|
|
|
## 四:Logstash安装部署
|
|
|
|
|
|
#### 1.获取包
|
|
|
|
|
|
无
|
|
|
|
|
|
#### 2.解压安装
|
|
|
|
|
|
```shell
|
|
|
[root@logstash ~]# tar zxvf /usr/local/package/jdk-8u121-linux-x64.tar.gz -C /usr/local/
|
|
|
[root@logstash ~]# mv /usr/local/jdk-8u121 /usr/local/java
|
|
|
[root@logstash ~]# vim /etc/profile
|
|
|
JAVA_HOME=/usr/local/java
|
|
|
PATH=$JAVA_HOME/bin:$PATH
|
|
|
export JAVA_HOME PATH
|
|
|
[root@logstash ~]# source /etc/profile
|
|
|
[root@logstash ~]# tar xf logstash-6.5.0.tar.gz -C /opt/
|
|
|
[root@logstash ~]# mv /opt/logstash-6.5.0/ /opt/logstash
|
|
|
```
|
|
|
|
|
|
#### 3.使用
|
|
|
|
|
|
输入输出都为终端
|
|
|
|
|
|
```shell
|
|
|
[root@elk-node1 ~]# /opt/logstash/bin/logstash -e 'input { stdin{} } output { stdout{} }'
|
|
|
-e 后面跟搜集定义输出(input [filter] output)后面跟{}
|
|
|
```
|
|
|
|
|
|
输入是终端的标准输入,输出到ES集群
|
|
|
|
|
|
```shell
|
|
|
[root@elk-node1 ~]# /opt/logstash/bin/logstash -e 'input { stdin{} } output { elasticsearch { hosts => ["192.168.1.160:9200"]} }'
|
|
|
Settings: Default filter workers: 1
|
|
|
Logstash startup completed #输入下面的测试数据
|
|
|
123456
|
|
|
wangshibo
|
|
|
huanqiu
|
|
|
hahaha
|
|
|
```
|
|
|
|
|
|
采集单个文件
|
|
|
|
|
|
```json
|
|
|
[root@logstash ~]# cat /opt/nginx_access_logstash.conf
|
|
|
input{
|
|
|
file {
|
|
|
path => "/var/log/nginx/access_json.log"
|
|
|
start_position => "beginning"
|
|
|
}
|
|
|
}
|
|
|
|
|
|
output{
|
|
|
|
|
|
elasticsearch {
|
|
|
hosts => ["10.9.12.86:9200"]
|
|
|
index => "nginx-access-json-%{+YYYY.MM.dd}"
|
|
|
}
|
|
|
|
|
|
}
|
|
|
```
|
|
|
|
|
|
采集多个文件
|
|
|
|
|
|
```json
|
|
|
[root@logstash ~]# cat /opt/files.conf
|
|
|
input {
|
|
|
file {
|
|
|
path => "/var/log/messages"
|
|
|
type => "system"
|
|
|
start_position => "beginning"
|
|
|
}
|
|
|
}
|
|
|
input {
|
|
|
file {
|
|
|
path => "/var/log/yum.log"
|
|
|
type => "safeware"
|
|
|
start_position => "beginning"
|
|
|
}
|
|
|
}
|
|
|
output {
|
|
|
|
|
|
if [type] == "system"{
|
|
|
elasticsearch {
|
|
|
hosts => ["10.9.12.86:9200"]
|
|
|
index => "system-%{+YYYY.MM.dd}"
|
|
|
}
|
|
|
}
|
|
|
if [type] == "safeware"{
|
|
|
elasticsearch {
|
|
|
hosts => ["10.9.12.86:9200"]
|
|
|
index => "safeware-%{+YYYY.MM.dd}"
|
|
|
}
|
|
|
}
|
|
|
}
|
|
|
```
|
|
|
|
|
|
#### 4.定义nginx的日志格式并采集
|
|
|
|
|
|
Nginx配置文件修改
|
|
|
|
|
|
```
|
|
|
log_format json '{"@timestamp":"$time_iso8601",'
|
|
|
'"@version":"1",'
|
|
|
'"client":"$remote_addr",'
|
|
|
'"url":"$uri",'
|
|
|
'"status":"$status",'
|
|
|
'"domain":"$host",'
|
|
|
'"host":"$server_addr",'
|
|
|
'"size":$body_bytes_sent,'
|
|
|
'"responsetime":$request_time,'
|
|
|
'"referer": "$http_referer",'
|
|
|
'"ua": "$http_user_agent"'
|
|
|
'}';
|
|
|
|
|
|
|
|
|
access_log /var/log/nginx/access_json.log json;
|
|
|
```
|
|
|
|
|
|
定义采集配置文件
|
|
|
|
|
|
```json
|
|
|
input {
|
|
|
file {
|
|
|
path => "/var/log/nginx/access_json.log"
|
|
|
start_position => "beginning"
|
|
|
}
|
|
|
}
|
|
|
output {
|
|
|
elasticsearch {
|
|
|
hosts => ["192.168.122.118:9200"]
|
|
|
index => "nginx1-%{+YYYY.MM.dd}"
|
|
|
}
|
|
|
}
|
|
|
```
|
|
|
|
|
|
ES查看索引,Kibana展示数据 |